Table of Contents
iPhone 14 Pro Max Screen Replacement Guide
Replacing the screen on your iPhone 14 Pro Max can be a meticulous task, but with the right tools and instructions, you can save time and money by doing it yourself. This guide will walk you through the step-by-step process of replacing your iPhone 14 Pro Max screen.
Tools You Will Need:
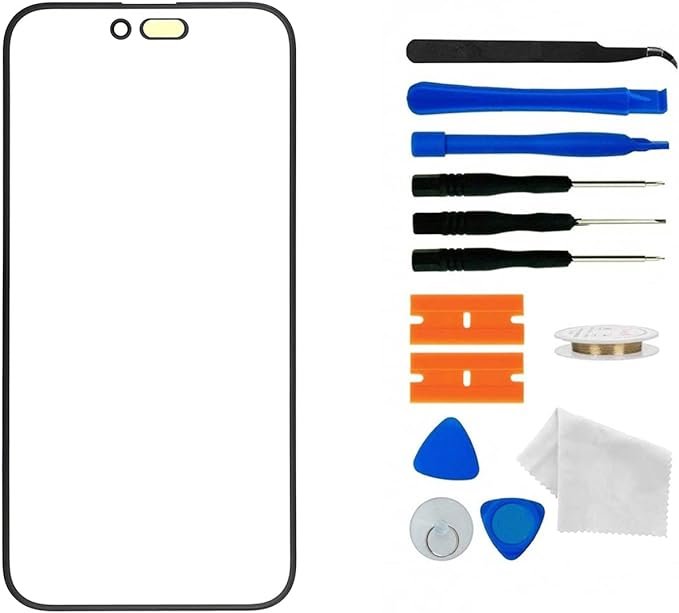
- Pointed-ended tweezers
- Metal pry tool
- Plastic pry tools (like a guitar pick)
- P2 screwdriver
- A heating pad or screen remover tool
- Plastic spudger
- Y0 screwdriver
- PH0 screwdriver
- Isopropyl alcohol
Step-by-Step Guide:
Step 1: Remove the Bottom Screws
- Using the P2 screwdriver, remove the two screws from the bottom of the iPhone 14 Pro Max.
Step 2: Heat the Screen
- If you don’t have a screen remover tool, use a heating pad to warm up the screen. This helps soften the adhesive, making removing the screen without breaking it easier.
Step 3: Use the Screen Remover Tool
- Place the iPhone in a screen remover tool, if available. Please wait for the long beep which indicates it’s ready for screen removal.
Step 4: Pry Off the Screen
- Use a plastic pry tool to gently lift the screen. Start from the bottom and work your way around the edges. Be cautious not to insert the tool too far to avoid damaging internal components.
Step 5: Remove the Bracket
- Use the Y0 screwdriver to remove the screws holding the bracket that secures the connections for the screen and battery.
- Carefully lift the bracket using a plastic spudger.
Step 6: Disconnect the Battery and Screen
- Use the flat end of the spudger to disconnect the battery.
- Proceed to disconnect the screen and the proximity sensor.
Step 7: Remove the Proximity Sensor
- Use the PH0 screwdriver to remove the screws securing the proximity sensor.
- Carefully lift the sensor using pointed-ended tweezers. Apply heat and a small amount of alcohol if necessary to ease the removal process.
Step 8: Test the New Screen
- Before fully assembling, test the new screen to ensure it works correctly. Connect the new screen and proximity sensor temporarily and power on the device to check functionality.
Step 9: Install the New Screen
- Once tested, place the new screen on the iPhone.
- Secure the proximity sensor with the PH0 screwdriver.
- Reconnect the screen and battery, and then reattach the bracket with the Y0 screwdriver.
Step 10: Final Assembly
- Lay down the adhesive strips carefully around the frame of the iPhone.
- Place the new screen, starting from the top (camera side), and gently press it down to secure it in place.
- Screw in the bottom P2 screws to finish the assembly.
Check the Latest Price on Amazon and Buy Now!
Outer Lens Glass Screen Replacement Repair with Adhesive and Tool Kit

By following these steps, you should successfully replace the screen on your iPhone 14 Pro Max. Ensure to handle all components with care to avoid any damage.


